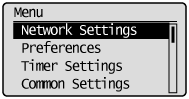
1.
Press [ ] (Menu).
] (Menu).2.
Select <Network Settings> using [ ] or [
 ] and press [OK].
] or [] and press [OK].When the system manager ID and system manager PIN are specified
Use the numeric keys to enter the ID and number, and then press [ ] (Log In/Out).
] (Log In/Out).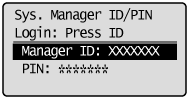
3.
Select <SNMP Settings> using [] or [] and press [OK].
] or [] and press [OK].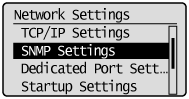
4.
Select <SNMPv1 Settings> using [] or [] and press [OK].
] or [] and press [OK].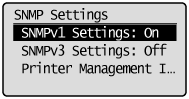
5.
Specify the SNMP protocol.
When you do not use the SNMPv1 protocol
|
(1)
|
Select <Off> using [
] or [] and press [OK].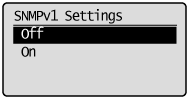 |
|
(2)
|
Press [
] (Menu) to close the menu screen. |
|
(3)
|
Restart the machine.
Turn OFF the machine and wait for at least 10 seconds before turning it back ON.
|
When you use the SNMPv1 protocol
|
(1)
|
Select <On> using [
] or [] and press [OK].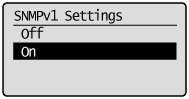 |
||||||||||||||||||||||||||
|
(2)
|
Select the item to specify using [
] or [] and press [OK].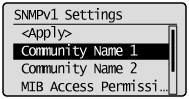 |
||||||||||||||||||||||||||
|
(3)
|
Specify the SNMP protocol.
|
||||||||||||||||||||||||||
|
(4)
|
Press [
] (Menu) to close the menu screen. |
||||||||||||||||||||||||||
|
(5)
|
Restart the machine.
The settings become effective after restarting the machine.
|