|
Before scanning with the WIA driver, see "Attention (WIA Driver)."
|
This section describes how to scan documents with the WIA driver.
You can specify detailed settings for each scan.
1.
Place your document.
2.
Press [ ].
].
 ].
].
3.
Select <Remote Scanner> using [ ] or [
 ] and press [OK].
 ] or [
 ] and press [OK].
The machine is now waiting to be scanned.


4.
Open the [Scanners and Cameras] folder.
5.
Double-click the WIA driver icon.
6.
Click [Next].
Select a picture type.
[Color picture]
[Grayscale picture]
[Black and white picture or text]
[Custom]
Click [Custom settings] to make detailed settings in the [Properties] dialog box.
Click [Custom settings] to make detailed settings in the [Properties] dialog box.

8.
Select a feeding method. (MF8380Cdw/MF8080Cw Only)
[Flatbed] (platen glass)
[Document Feeder] (feeder)
9.
Specify the scanning area.
If you selected [Flatbed] as the paper source
Click [Preview] and drag [ ] to specify the scanning area.
 ] to specify the scanning area.
When [Document Feeder] is selected (MF8380Cdw/MF8080Cw Only)
Select a document size from the drop-down menu.
10.
Click [Next].
11.
Specify a name, file format, and location for saving the group of pictures.
Select one of the following file formats.
[BMP (Bitmap Image)]
[JPG (JPEG Image)]
[TIF (TIF Image)]
[PNG (PNG Image)]
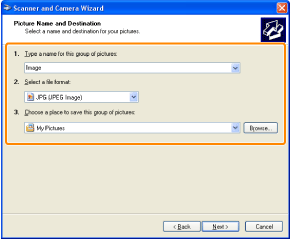
12.
Click [Next].
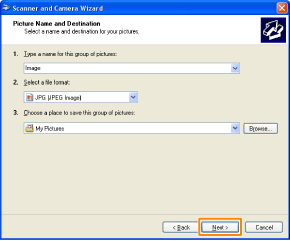
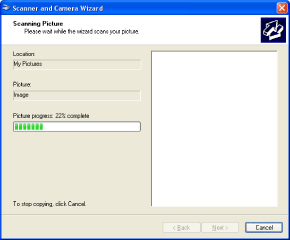
Scanning starts.
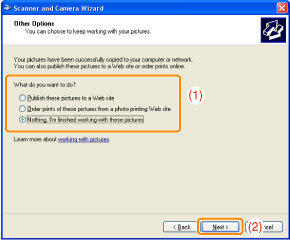
13.
Select an item and click [Next].
14.
Click [Finish].
You may not be able to use the function depending on the edition of Windows Vista/7 you are using.
1.
Place your document.
2.
Press [ ].
].
 ].
].
3.
Select <Remote Scanner> using [ ] or [
 ] and press [OK].
 ] or [
 ] and press [OK].
The machine is now waiting to be scanned.


4.
Open the [Windows Fax and Scan] dialog box.
5.
Click [New Scan] on the toolbar.
6.
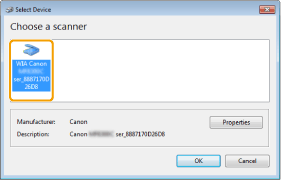
When the following screen appears, double-click the scanner icon.
7.
Specify the settings for scanning.
For details, see "[New Scan] Dialog Box."
8.
Click [Scan].
1.
Place your document.
2.
Press [ ].
].
 ].
].
3.
Select <Remote Scanner> using [ ] or [
 ] and press [OK].
 ] or [
 ] and press [OK].
The machine is now waiting to be scanned.


4.
Start [Windows Live Photo Gallery] (or [Windows Photo Gallery]).
For [Windows Live Photo Gallery]
From the [Start] menu, select [All Programs] -> [Windows Live] -> [Windows Live Photo Gallery].
For [Windows Photo Gallery]
From the [Start] menu, select [All Programs] -> [Windows Photo Gallery].
5.
Open the [Import Pictures and Videos] (or [Import Photos and Videos]) dialog box.
From the [File] menu, select [Import from camera or scanner] (or [Import photos and videos]).
6.
Double-click the scanner driver icon.
For Windows XP
For details, see the Step 6 to Step 14 in "Scanning from the [Scanner and Camera Wizard] dialog box (Windows XP only)."
For Windows Vista/7
Proceed to the Step 7..
7.
Specify the settings for scanning.
For details, see "[New Scan] Dialog Box."
8.
Click [Scan].
9.
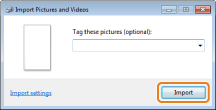
Click [Import].
[Tag these pictures (optional)]
You can classify the scanned image by entering in a tag.
You can classify the scanned image by entering in a tag.
Follow the procedures below when the WIA driver is displayed. For details on displaying the WIA driver, see the following.
1.
Place your document.
2.
Press [ ].
].
 ].
].
3.
Select <Remote Scanner> using [ ] or [
 ] and press [OK].
 ] or [
 ] and press [OK].
The machine is now waiting to be scanned.


4.
Select a feeding method. (MF8380Cdw/MF8080Cw Only)
[Flatbed] (platen glass)
[Document Feeder] (feeder)
5.
Select a picture type.
Select the type from the following settings.
[Color picture]
[Grayscale picture]
[Black and white picture or text]
[Custom settings]
6.
Click [Adjust the quality of the scanned picture] if necessary.
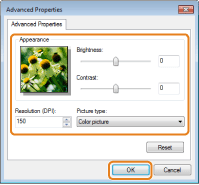
The [Advanced Properties] dialog box appears.
7.
Adjust the quality of the image and click [OK].
|
[Appearance]
|
A sample image is displayed.
|
|||||||||
|
[Brightness]
|
Specify the brightness (-127 to 127).
|
|||||||||
|
[Contrast]
|
Specify the contrast (-127 to 127) (for color and grayscale scanning only).
|
|||||||||
|
[Resolution (DPI)]
|
|
|||||||||
|
[Picture type]
|
Specify a color format ([Color picture], [Grayscale picture], or [Black and white picture or text]).
|
|||||||||
|
[Reset]
|
Reset all the current settings to their default values.
|
|||||||||
|
NOTE
|
|
The setting items and their default values in the [Advanced Properties] tab
They will vary depending on the selected image type.
|
8.
Specify the scanning area.
If you selected [Flatbed] as the paper source
Click [Preview] and drag [ ] to specify the scanning area.
 ] to specify the scanning area.
When [Document Feeder] is selected (MF8380Cdw/MF8080Cw Only)
Select the original document size from the drop-down menu.
9.
Click [Scan].